Here is the rotton plywood cut from the old hatch with my penknife stuck in the softened wood:

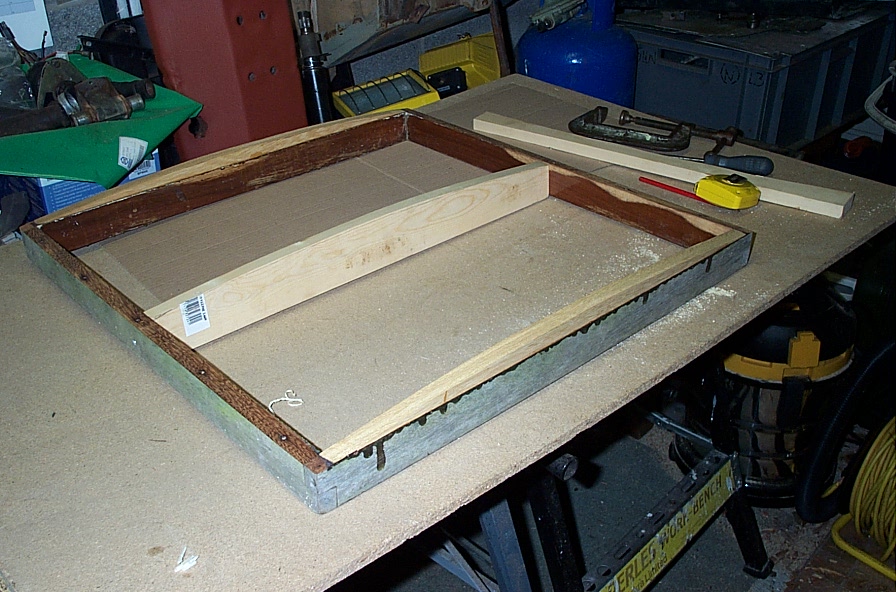
The old plywood was cut away with the jigsaw and the frame cleaned up. The camber of the surrounding deck was marked onto a template and transferred to suitable lengths of 3/4" thick iroko that were then glued to the fore and aft rails of the hatch frame and then carefully faired in:
The intention was to bend a new plywood hatch top over the cambered frame. However the original top was 3/4" thick and it would have been well nigh impossible to bend such thick ply over the lightweight frame. What I did was to attach a temporary frame with identical camber half-way across the hatch opening to support the ply as it was bent over the frame:
The new plywood hatchtop was made from three skins of 1/4" marine (BS1088) 5-ply. Each skin was laid at 90deg to the previous and glued with West Epoxy 205/106. As the job was done in winter I had to do the job indoors where it was warmer. (In the workshop it was well below freezing and no place to cure Epoxy!) Once the final skin was cured the edges were faired round, a hole cut for the vent and the whole top - and especially the edge grain of the ply - were sealed with a coat of epoxy prior to painting and varnishing:

Here is the finished hatch in place. Painted with 'Interdeck' cream and varnished frame and inner and fitted with a new ECS 'Tannoy' type closeable vent. The hatch is hinged at its after edge and clipped from below. There are two portable wedges that can be inserted into slots in the coamings (not shown) to prop the hatch open for ventilation. Water now sheds nicely off the hatch.

No comments:
Post a Comment